Okay, so I’ve been dreaming about customizing a BMW R bike for, like, forever. Finally took the plunge and started this project. It’s been a wild ride, let me tell you!
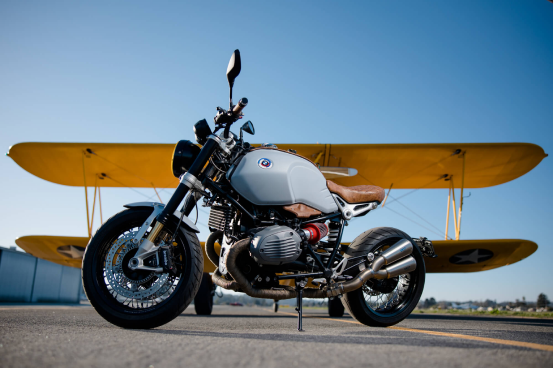
First things first, I had to find the right bike. I spent weeks scouring online listings, checking out local shops, and even bugging some friends who are into bikes. I finally landed on a used BMW R nineT. It wasn’t perfect, had some dings and scratches, but it had good bones and the price was right.
The Teardown
Getting the bike back to my garage was step one. Then came the fun (and messy) part – tearing it down! I started by carefully removing the fairings, the seat, the tank… basically anything that I knew I wanted to change or modify. I took tons of pictures as I went, labeled everything, and kept all the screws and bolts organized in little baggies. I learned this the hard way from past projects – trust me, you don’t want to lose track of those tiny parts!
The Vision
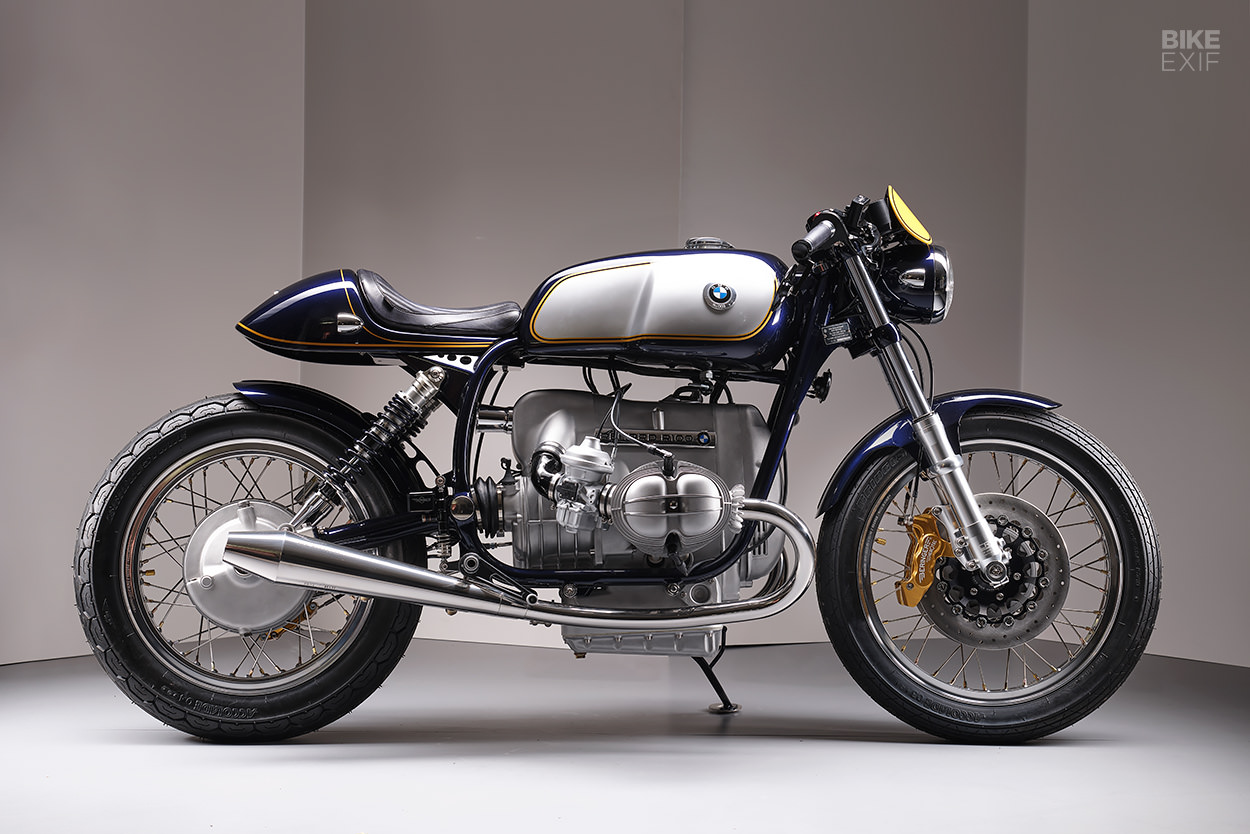
I had a pretty clear idea of what I wanted: a classic, clean look, with some modern touches. I’m a big fan of the cafe racer style, but I also wanted it to be comfortable enough for longer rides. So, I started sketching out some ideas, browsing online for inspiration, and pinning a ridiculous number of photos to a board. This is a constant battle of making sure to stick to my design goals, there are so many pretty things out there!
The Customization
- Seat: The stock seat had to go. I wanted something lower and sleeker. I found a custom seat maker online and worked with him to design exactly what I wanted. It turned out amazing, with a nice brown leather finish.
- Exhaust: I’m not a huge fan of super loud bikes, but I did want something with a bit more rumble. I ended up going with a slip-on exhaust from a reputable brand. It was relatively easy to install and gave the bike a much throatier sound.
- Handlebars: Clip-on handlebars were a must for that cafe racer look. This was a bit tricky, as I had to make sure they would fit with the existing controls and wiring. I had to reroute some cables, but it was totally worth it.
- Paint: This was the biggest decision. I went back and forth between so many colors. In the end, I decided on a classic metallic grey with some subtle black accents. I prepped the tank and other parts myself, then took them to a local paint shop.
- Lights: I swapped out the stock headlight and taillight for some smaller, more modern LED units. This gave the bike a much cleaner look and improved visibility. I did have to learn a bit of basic wiring, but I found some great tutorials online.
Putting It All Back Together
Once all the parts were painted and customized, it was time for the reassembly. This was probably the most satisfying part of the whole project. Seeing all the individual pieces come together and transform back into a motorcycle was awesome. I took my time, double-checked everything, and made sure all the bolts were properly tightened. I did have to get an expereinced friend help make sure I put the bike back together correctly.
The First Ride
Finally, the moment of truth! Taking the customized R nineT out for its first ride was exhilarating. All the hard work, the late nights, the frustrations… it all paid off. The bike looked amazing, sounded great, and felt fantastic to ride. I’ve been tweaking a few things here and there, but overall, I’m incredibly happy with how it turned out. This project was a huge learning experience, and I’m already thinking about my next build!