

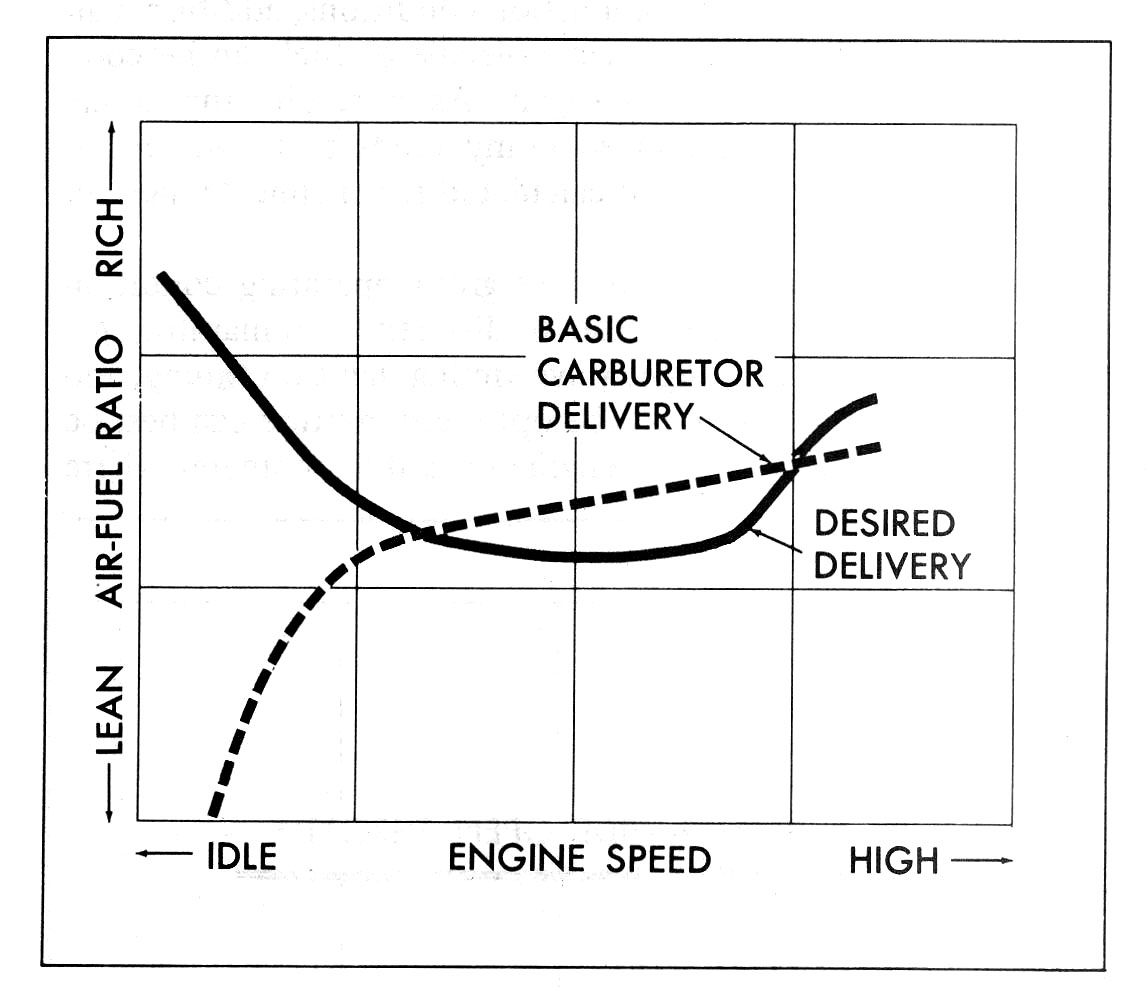
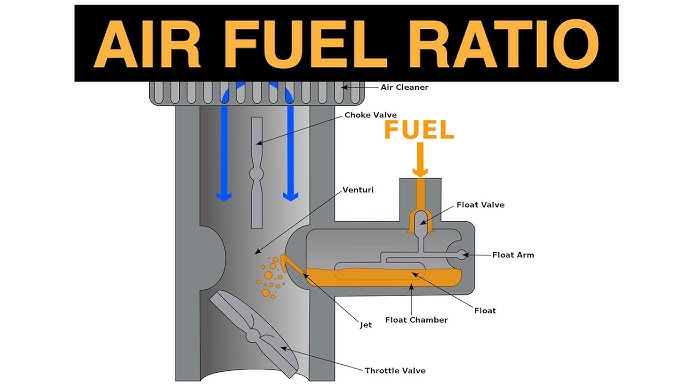
Okay, so today I wanted to mess around with my old motorcycle and see if I could figure out this whole carburetor ratio thing. I’m no mechanic, mind you, but I like to tinker.
First, I grabbed my tools – a basic wrench set, some screwdrivers, and a pair of pliers. Nothing fancy. I also found an old rag to wipe off any gunk. Then, I wheeled the bike out into the sunlight. It’s way easier to see what you’re doing when you’re not fumbling around in a dark garage.
I started by taking a good look at the carburetor itself. It’s this metal thing with a bunch of hoses and screws attached to it. Honestly, it looked pretty intimidating at first.
- I carefully removed the air filter to get a better view.
- Then I gently took off the fuel line, making sure not to spill gas everywhere. (Learned that lesson the hard way before!)
Next, I located the adjustment screws. There are usually two – one for idle speed and one for the air/fuel mixture. I marked their original positions with a Sharpie, just in case I messed things up and needed to go back to the starting point.
Playing with the Screws
This is where it got interesting. I turned the mixture screw a tiny bit clockwise, then listened to the engine. It started to sound a little rough. Then I turned it back the other way, and it smoothed out. I kept tweaking it back and forth until I found the sweet spot where the engine sounded its best – not too fast, not too slow, just a nice, steady hum.
After that, I adjusted the idle screw to get the engine running at a good speed when it’s just sitting there. Again, I just listened and felt for what seemed right.
Finally, I put everything back together – fuel line, air filter, all that jazz. I fired up the engine and took it for a short spin around the block. It definitely felt like it was running smoother than before!
So, that’s my little carburetor adventure. I wouldn’t say I’m an expert now, but I definitely learned a thing or two. And the best part? My bike is running better than ever!